Tuesday, November 13, 2012
How to Crochet a Basic Hat
The pattern that I use for crocheting my hats is simple and can be adjusted to fit any age or size. You can head on over to my facebook page or my etsy shop to see some of the hats and other items that I've crocheted. You also may have read about my hat crocheting frenzy here on Friday. Later on I'll be updating you and sharing pictures on how the hats for the boys turned out!
Terms used in this pattern:
CH: chain
SC: single crochet
SLST: slip stich
INCR: increase
Yarn I use:
Red Heart Super Saver Economy--one skein yields approximately two hats depending on the size you make them. Any yarn works well as long as its a medium weight.
Hook size:
I-9 (5.5 mm)
Directions:
Begin with a magic circle, CH 1. (If you have never worked with a magic circle, watch this tutorial to learn how)
SC 10 into the magic circle; pull circle closed, SLST to first SC; CH 1
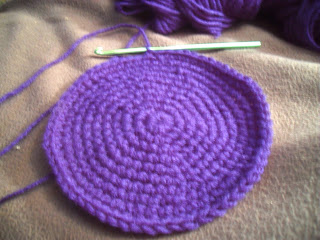
From here, the hat is going to be worked in a pattern of increases and single stitches until we reach the desired size. An increase is when you SC twice in the same stitch. The pattern is easy to remember if we assign a number to each row we crochet.
Row 1: INCR SC, INCR SC, INCR SC, until the end of the row
Row 2: INCR SC SC, INCR SC SC, INCR SC SC, until the end of the row
Row 3: INCR SC SC SC, INCR SC SC SC, INCR SC SC SC until the end of the row
Do you see how the row number controls how many SC we put between each increase?
In order to recognize when I've reached the end of a row, I use the place where I SLST my magic loop together as a point of reference. The beginning/end of each row should line up with this spot.
You will continue to apply this pattern until the circle grows to the correct circumference for your hat. Here is a size chart to guide you:
An easy way to measure the circumference of your circle is to count every three stitches as one inch.
When you are sure that your hat's circle is the correct circumference, SC in each stitch (NO INCREASES) until you reach the desired height (see chart above).
SLST to finish and tie off any loose ends.
And that's all there is to it folks! You can add to this pattern by incorporating different colored stripes, pom poms, appliques, or stitching.
Enjoy creating!
Subscribe to:
Post Comments (Atom)


No comments:
Post a Comment